Summary
Managing your Magento 2 eCommerce catalog through product import from Excel spreadsheets is always easier. If you want to import CSV files, to avoid errors in the process, you should follow these steps mentioned in the guide above: preparing the CSV file, validating data, and learning how to solve the most frequent problems.
Embrace the power of bulk uploads to save time and scale your store effortlessly. Whether you're updating existing products or launching a new catalog, Magento 2 Excel product import is the key to efficient store management.
Do you want to manually add products to your Magento 2 store, one by one? The thought of importing hundreds or thousands of products can be overwhelming, like packing up your entire house to move to a new one. But what if you could simplify the process, saving time and reducing stress? Magento 2's powerful import tools make it possible.
In this guide, we'll take you by the hand and walk you through the easy-to-follow steps to import your products in bulk. This will ensure a smooth transition and free up more time for what matters—growing your business and delighting your customers.
Table of Contents
Preparing for Product Import in Magento 2
To enhance your Magento 2 store's functionality and user experience, consider customizing it with tailored themes, extensions, and plugins. Customizations improve the overall look and feel of your store after product import.
Efficiently importing products into Magento 2 requires proper preparation to ensure accuracy and avoid errors. This involves creating a well-structured CSV file, mapping attributes correctly, setting up categories, and ensuring product images are accessible via URLs. Also, verify that required fields like SKU, product type, and price are complete and formatted correctly.
⇨ Step 1: Log in to the Magento Admin Panel
Begin by logging into your Magento 2 Admin Panel:
Navigate to the Magento Sign-in Page.
Enter your credentials.
From the dashboard, go to System > Data Transfer > Import.
This is where the entire product import process starts.

⇨ Step 2: Understand the Magento 2 CSV Template
Magento requires that your product data be uploaded in a specific format, typically using a CSV (Comma-Separated Values) file. To ensure your file meets Magento’s requirements:
Navigate to System > Data Transfer > Export.
Select Products from the Entity Type dropdown.
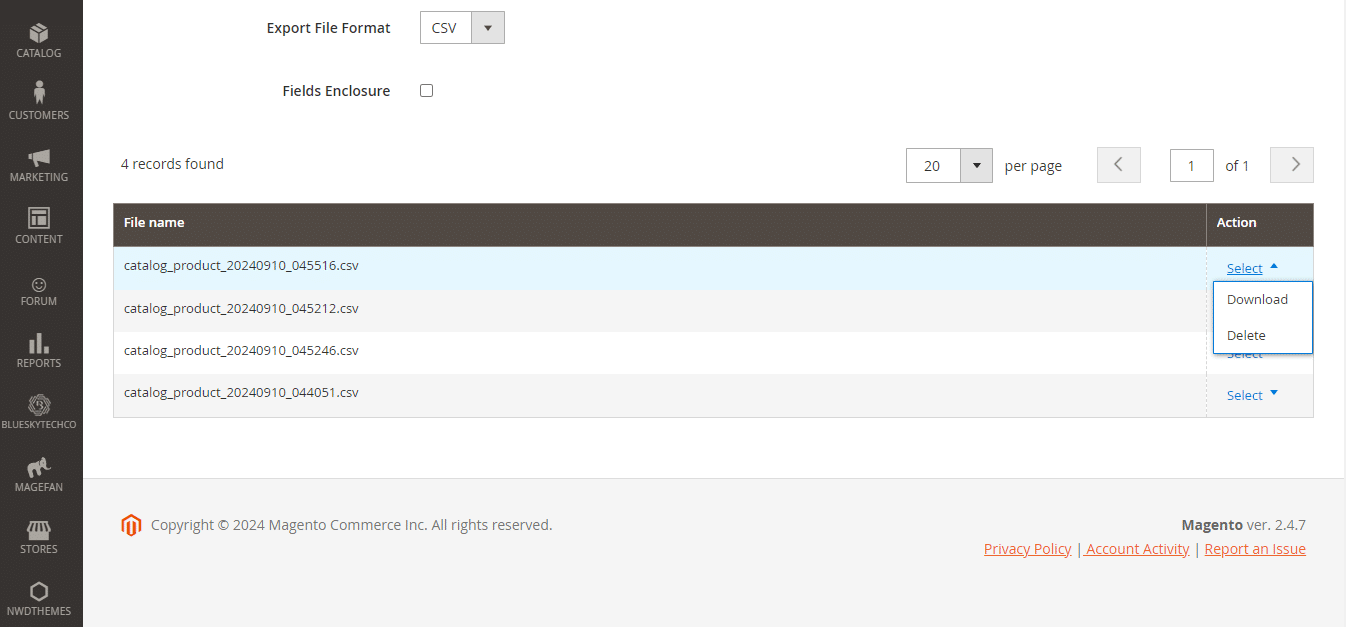
The downloaded file serves as a reference for structuring your product data. Familiarize yourself with the columns, including:
⇨ Step 3: Prepare Your Product Data in Excel
Prepare your product data according to the sample file using tools like Microsoft Excel or Google Sheets. Follow these tips:
Save the file in CSV format after preparation.

Importing Products into Magento 2
Following the steps outlined in this guide will make importing products into Magento 2 a simple process. If you encounter any issues along the way, you can always reach out to a Magento experts for assistance.
⇨ Step 1: Upload Your CSV File
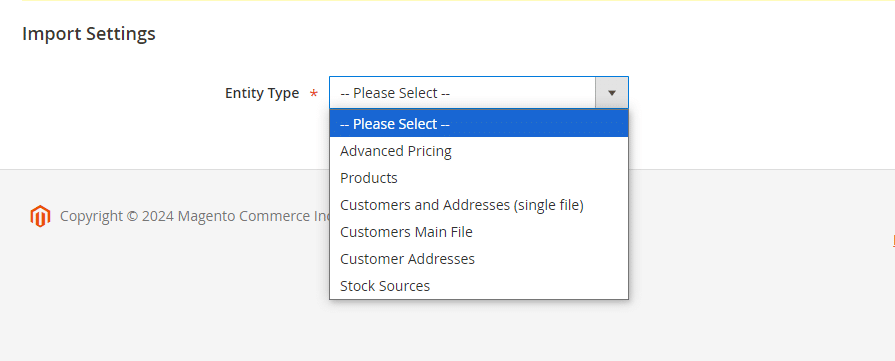
- Navigate to System > Data Transfer > Import in the Admin Panel.
- Select Products from the Entity Type dropdown.
- Click Choose File to upload your prepared CSV.
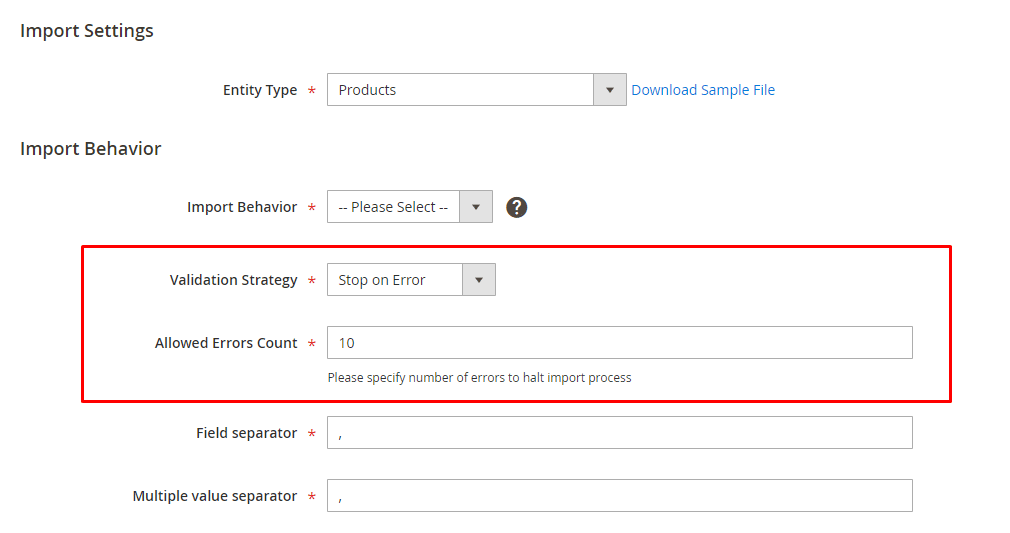
⇨ Step 2: Choose the Import Behavior
Magento offers three import behaviors -
Add/Update: Adds new products and updates existing ones.
Replace: Replace all existing data with the new data.
Delete: Removes matching products based on SKUs.

⇨ Step 3: Validate the Import File
Click Check Data to validate the CSV file. Magento will identify errors, such as -
If errors occur, fix them in your CSV file and re-upload.

⇨ Step 4: Import Products
Once the file passes validation -
Click Import to begin the process.
Wait for the import to complete.
Check for a success message indicating all products were uploaded correctly.

Besides importing products into Magento, if you're managing a growing catalog and considering expanding your store's capabilities, a multi-vendor module could be a game-changer. With it, you can transform your Magento store into a marketplace where multiple vendors can sell their products.
Post-Import Actions
⇨ 1. Verify Products in the Catalog
Navigate to Catalog > Products in the Admin Panel to ensure all products are visible and correctly listed.
⇨ 2. Index Product Data
Run the following command in the Magento CLI to reindex the catalog:
php bin/magento indexer:reindex
Reindexing ensures that changes are reflected in the frontend.
⇨ 3. Clear Cache
To display the latest product data, clear the Magento cache:
Go to System > Cache Management.
- Click Flush Magento Cache.
Common Magento 2 Import Errors and Fixes
⇨ 1. Incorrect Visibility Values
Error: Invalid values in the Visibility field.
Fix: Use valid Magento visibility values, such as -
- for Not Visible Individually.
- for Catalog.
- for Search.
- for Catalog and Search.
⇨ 2. Invalid Separators
Error: Separators in the CSV file don’t match Magento’s configuration.
Fix: Ensure the file uses commas as separators and double quotes around text values.⇨ 3. Missing Required Fields
Error: Missing columns like SKU or Price.
Fix: Double-check that all mandatory fields are present and populated.⇨ 4. File Size Exceeds Limit
Error: File size exceeds the default 2MB limit.
Fix: Increase the upload limit in the php.ini file:ini
Copy code
upload_max_filesize = 20M
post_max_size = 20M
Restart the server after making changes.
⇨ 5. Image Path Errors
Error: Images don’t display after import.
Fix:
Advanced Tips for Magento 2 Product Import
Automate imports using cron jobs for large-scale operations. If you need assistance implementing import techniques or troubleshooting, you can get from a Magento developer to ensure seamless integration and expert handling of your catalog updates.
⇨ 1. Use Extensions for Enhanced Functionality
Third-party extensions like Firebear Studio’s Improved Import & Export offer -
⇨ 2. Automate Product Imports
Automate imports using cron jobs for large-scale operations. This is especially useful for syncing products with external systems.
⇨ 3. Leverage Magento API for Imports
For developers, Magento’s REST or GraphQL APIs provide programmatic access to product imports, allowing integration with third-party systems.